By Omar Hboubati
This is a tutorial for running x86_64 on a Mac with Apple Silicon. These instructions work for me on a MacBook Pro M1 with Visual Studio Code, but there's no guarantee they will work on every machine.
What we're doing is converting a .asm file to an x86_64 machine code file on our machine using nasm and x86_64-elf-gcc. Then, we copy that file to a Docker Ubuntu container, where we run the file.
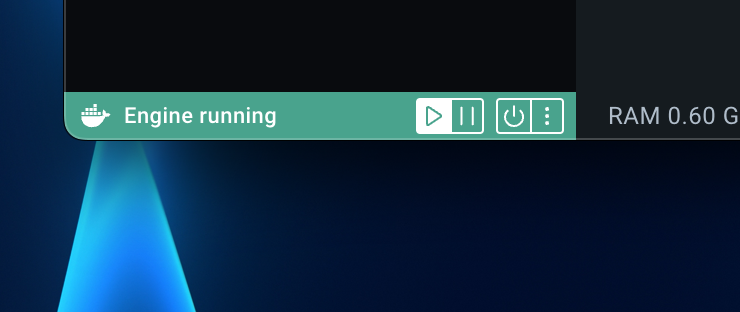
Install the app, then open.
You should see a green bar at the bottom. Keep the engine running while you are working.
Make sure you have Homebrew installed (You can check with brew -v in your terminal).
If not, go to Homebrew's website.
Then, install nasm and x86_64-elf-gcc:
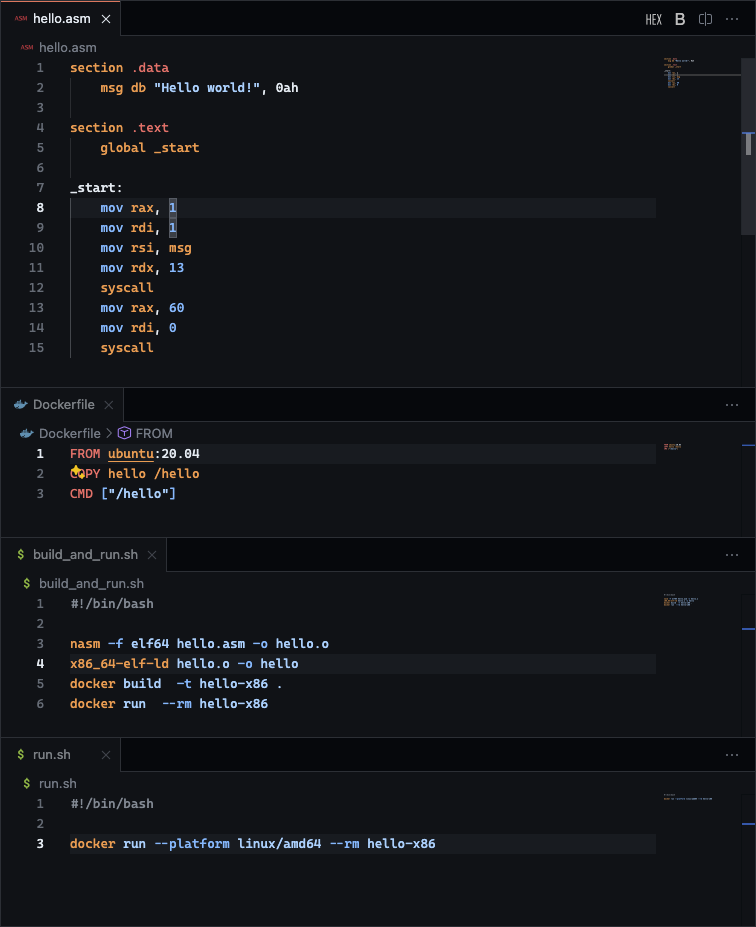
brew install nasm x86_64-elf-gccThis is the example working directory
hello_projectDockerfilehello.asmbuild_and_run.shrun.sh
All commands from now on will be run in this directory.
Example we will be working with:
hello.asm
section .data
    msg db "Hello world!", 0ah

section .text
    global _start

_start:
    mov rax, 1
    mov rdi, 1
    mov rsi, msg
    mov rdx, 13
    syscall
    mov rax, 60
    mov rdi, 0
syscallUnless your project also happens to be hello you probably want to change the name.
This is the naming:
(On local machine) hello.asm -> hello.o -> hello -> (Docker) -> \hello
If you change the name in one, you have to change it in all four.
Also, don't change the extensions.
In the directory you're working in, make a Dockerfile (one word, no extension). See the following example:
Dockerfile
# This will be an ubuntu environment
FROM ubuntu:20.04

# Copying the machine language file to the Docker environment. Change "hello" to the name of your output
COPY hello /hello

# Exedcuting the machine language file. Change "hello" to whatever you copied the file as.
CMD ["/hello"]First, we need to assemble and link the .asm file.
Assemble the code
nasm -f elf64 hello.asm -o hello.o
Link the object file
x86_64-elf-ld hello.o -o hello
Then, you need to build and run the Docker image.
hello-x86 is the name of the project, and you can change it. But you have to change it for every command.
Build the Docker image
docker build -t hello-x86 .
Run the Docker container
docker run --rm hello-x86
Then if everything works out, it should output Hello world!.
You probably have a 40% chance at success.
If everything works for some reason, then every time you change the file you have to do a bunch of commands which is boring.
So you can make a script. Put this in your directory:
build_and_run.sh
#!/bin/bash

nasm -f elf64 hello.asm -o hello.o
x86_64-elf-ld hello.o -o hello
docker build -t hello-x86 .
docker run --rm hello-x86
Whatever you name it will be what the command is. Then, put all the commands you need under the #!/bin/bash.
Then, you need to make the script executable:
chmod +x build_and_run.sh
Then, whenever you want to build and run, just do this:
./build_and_run.sh
If you really want to get fancy you can do this:
run.sh
#!/bin/bash

docker run --rm hello-x86
Once again, make it executable:
chmod +x run.sh
Then, you can run
./run.sh
when you want to run without re-building.
https://github.com/circlePulse/docker_test_x86/tree/main